
When it comes to roofing materials, metal roofing has become a popular choice for homeowners due to its durability, energy efficiency, and sleek appearance. For those looking to save on installation costs, DIY metal roofing installation can be an appealing solution. However, while it offers long-term savings, the process requires the right tools, careful planning, and a solid understanding of the steps involved.
This comprehensive guide will walk you through the process of installing a metal roof yourself, covering everything from selecting materials and tools to installation tips and common mistakes to avoid. Whether you’re a seasoned DIY enthusiast or tackling your first home improvement project, this guide will equip you with the knowledge needed for a successful metal roofing installation.
What is Metal Roofing?
Metal roofing refers to a roofing system made from metal pieces or tiles. These materials are designed to resist weather conditions, enhance energy efficiency, and last significantly longer than traditional asphalt shingles. The types of metal roofing include:
- Steel: Known for its strength and affordability.
- Aluminum: Lightweight, resistant to corrosion, and suitable for coastal areas.
- Copper: A premium option, offering aesthetic appeal and exceptional longevity.
Metal roofing is gaining popularity because of its ability to withstand harsh weather, such as heavy winds, rain, and snow, making it an ideal choice for areas with extreme climates.
Why Metal Roofing is Worth Installing
There are numerous advantages to installing a metal roof, including:
- Longevity: Metal roofs can last 40-70 years, far outlasting asphalt shingles, which generally need replacement after 20 years.
- Energy Efficiency: Metal roofs reflect solar heat, which can reduce cooling costs by up to 25%.
- Durability: Resistant to fire, mold, and rot, metal roofing can withstand harsh weather conditions like heavy rain, snow, and high winds.
- Aesthetics: Available in a variety of colors and styles, metal roofing can complement any home design, from modern to rustic.
Who Should Consider DIY Metal Roofing Installation?
DIY metal roofing installation is a viable option for homeowners looking to save money on labor costs. However, it’s important to assess whether you’re up for the challenge. This project is best suited for:
- Homeowners with experience in DIY home improvement: If you have some experience with basic construction projects and feel comfortable working on a roof, this project might be for you.
- Those willing to invest time and effort: DIY roofing installation is physically demanding, requiring time, patience, and attention to detail.
If you’re unsure about your skill level, consider consulting with a professional for advice before committing to the project.
When to Install Metal Roofing
The best time to install a metal roof is during mild weather, typically in the spring or fall. Installing in extreme heat or cold can make the roofing material difficult to handle and increase the risk of mistakes. Additionally, it’s crucial that the roof is dry and clear of debris to ensure a smooth and safe installation process.
How to Install Metal Roofing: Step-by-Step Guide
Here’s a detailed breakdown of the steps involved in DIY metal roofing installation.
Step 1: Prepare Your Roof
Before you begin, make sure your roof is structurally sound. If you’re installing over existing shingles, check for damage and ensure the surface is smooth. Remove any old roofing materials, and inspect the underlying structure for issues such as leaks or rot.
Step 2: Install Underlayment
Underlayment is an essential layer of protection between the metal roofing and the roof deck. It helps to prevent moisture from seeping into the roof and provides additional insulation. Roll out roofing felt or synthetic underlayment over the entire roof surface, securing it with roofing nails or staples.
Step 3: Position the Metal Sheets
Start at the bottom of the roof and work upwards. Place the first metal sheet along the eaves, making sure it overhangs slightly to allow water to flow off the roof properly. Align the sheets side by side, overlapping them to ensure a watertight seal.
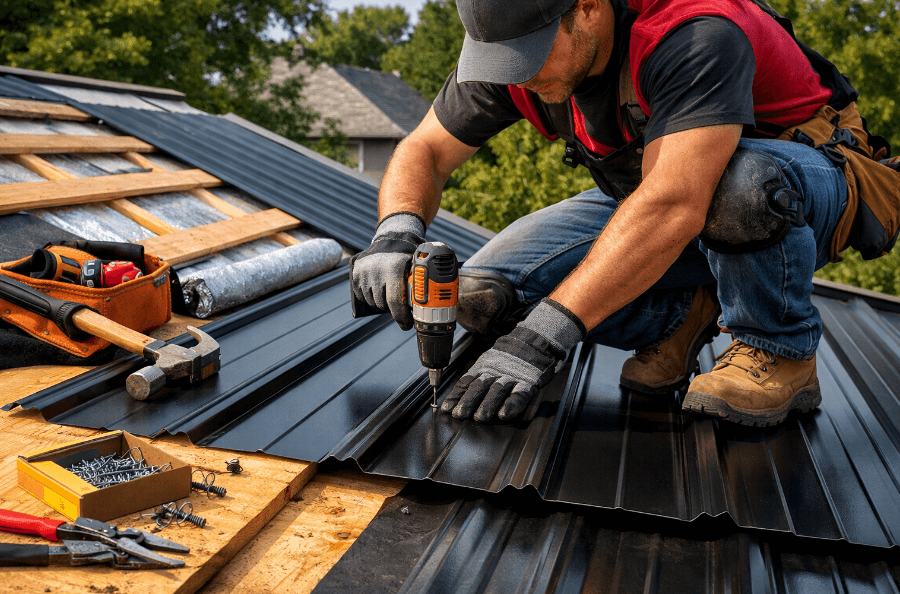
Step 4: Secure the Metal Sheets
Use roofing screws to secure the metal sheets to the roof deck. Be sure to position the screws at the ridges of the panels, where they will be hidden under the overlapping edges. Avoid over-tightening the screws, as this can lead to leaks or damage.
Step 5: Install Flashing and Trims
Once the metal sheets are in place, install flashing around the roof’s edges, chimneys, and vents. Flashing prevents water from seeping into the seams where the metal panels meet other structures. Finish by adding ridge caps and eave trims for a clean and finished look.
Common Mistakes in Metal Roofing Installation
While DIY metal roofing installation can be a rewarding experience, there are several common mistakes to avoid:
- Improper Screwing: Too much pressure can strip the screws, while too little can result in the panels coming loose.
- Skipping Underlayment: Underlayment is essential for moisture protection; skipping this step can lead to leaks.
- Incorrect Overlaps: Ensure the panels are properly overlapped to prevent water from leaking between the seams.
- Inadequate Flashing: Neglecting to install flashing around edges, vents, and chimneys can lead to water damage.
Tools and Materials Needed for DIY Metal Roofing
To successfully install a metal roof, you’ll need the following tools and materials:
- Metal Sheets: Choose the right type of metal (steel, aluminum, copper) for your region and budget.
- Roofing Screws: Use screws specifically designed for metal roofing.
- Metal Shears or Tin Snips: To cut metal sheets to size.
- Roofing Hammer: For nailing flashing and securing underlayment.
- Chalk Line: To mark straight lines for precise installation.
- Safety Gear: Including a harness, gloves, and non-slip shoes.
Cost of DIY Metal Roofing
The cost of installing a metal roof yourself can vary based on materials, the size of the roof, and the complexity of the installation. On average, the cost of metal roofing materials ranges from $1.50 to $6 per square foot. This means that for a typical 1,500-square-foot roof, the material cost could range from $2,250 to $9,000. Keep in mind that additional costs for tools, underlayment, and fasteners should also be considered.
Local Considerations for Metal Roofing
When considering DIY metal roofing in different regions of the USA, it’s important to account for local climate conditions. For example:
- Coastal Areas: Saltwater and humidity can cause corrosion, so aluminum or copper roofing is recommended.
- Snow-prone Areas: Metal roofing sheds snow easily, making it ideal for regions with heavy snowfall.
- Hot Climates: Metal roofs reflect heat, making them perfect for reducing cooling costs in areas with hot summers.
Additionally, local regulations or building codes may require specific types of roofing materials or installation practices, so always check with local authorities before beginning your project.
FAQs
How much does it cost to install a metal roof yourself?
The cost of materials for a DIY metal roof installation ranges from $1.50 to $6 per square foot, depending on the material used.
What are the best materials for DIY metal roofing?
Steel and aluminum are the most commonly used materials for DIY installations, as they offer a balance of affordability and durability.
Can I install metal roofing over shingles?
Yes, metal roofing can be installed over existing shingles, but you must ensure the roof deck is in good condition and that there’s enough space for proper ventilation.
How long does a metal roof last?
Metal roofs typically last between 40 to 70 years, depending on the material and the quality of installation.
What tools are needed for installing a metal roof?
Essential tools include metal shears, a roofing hammer, roofing screws, a chalk line, and safety gear.
Can I install a metal roof by myself?
Yes, DIY metal roofing is possible for those with some experience in home improvement and the right tools. However, it’s a physically demanding task that requires careful planning.
How do I ensure my metal roof is weather-resistant?
Proper installation of flashing, underlayment, and correct overlapping of the metal sheets will ensure that your roof remains weather-resistant.
